How to connect your odroid to wifi#
Before we start#
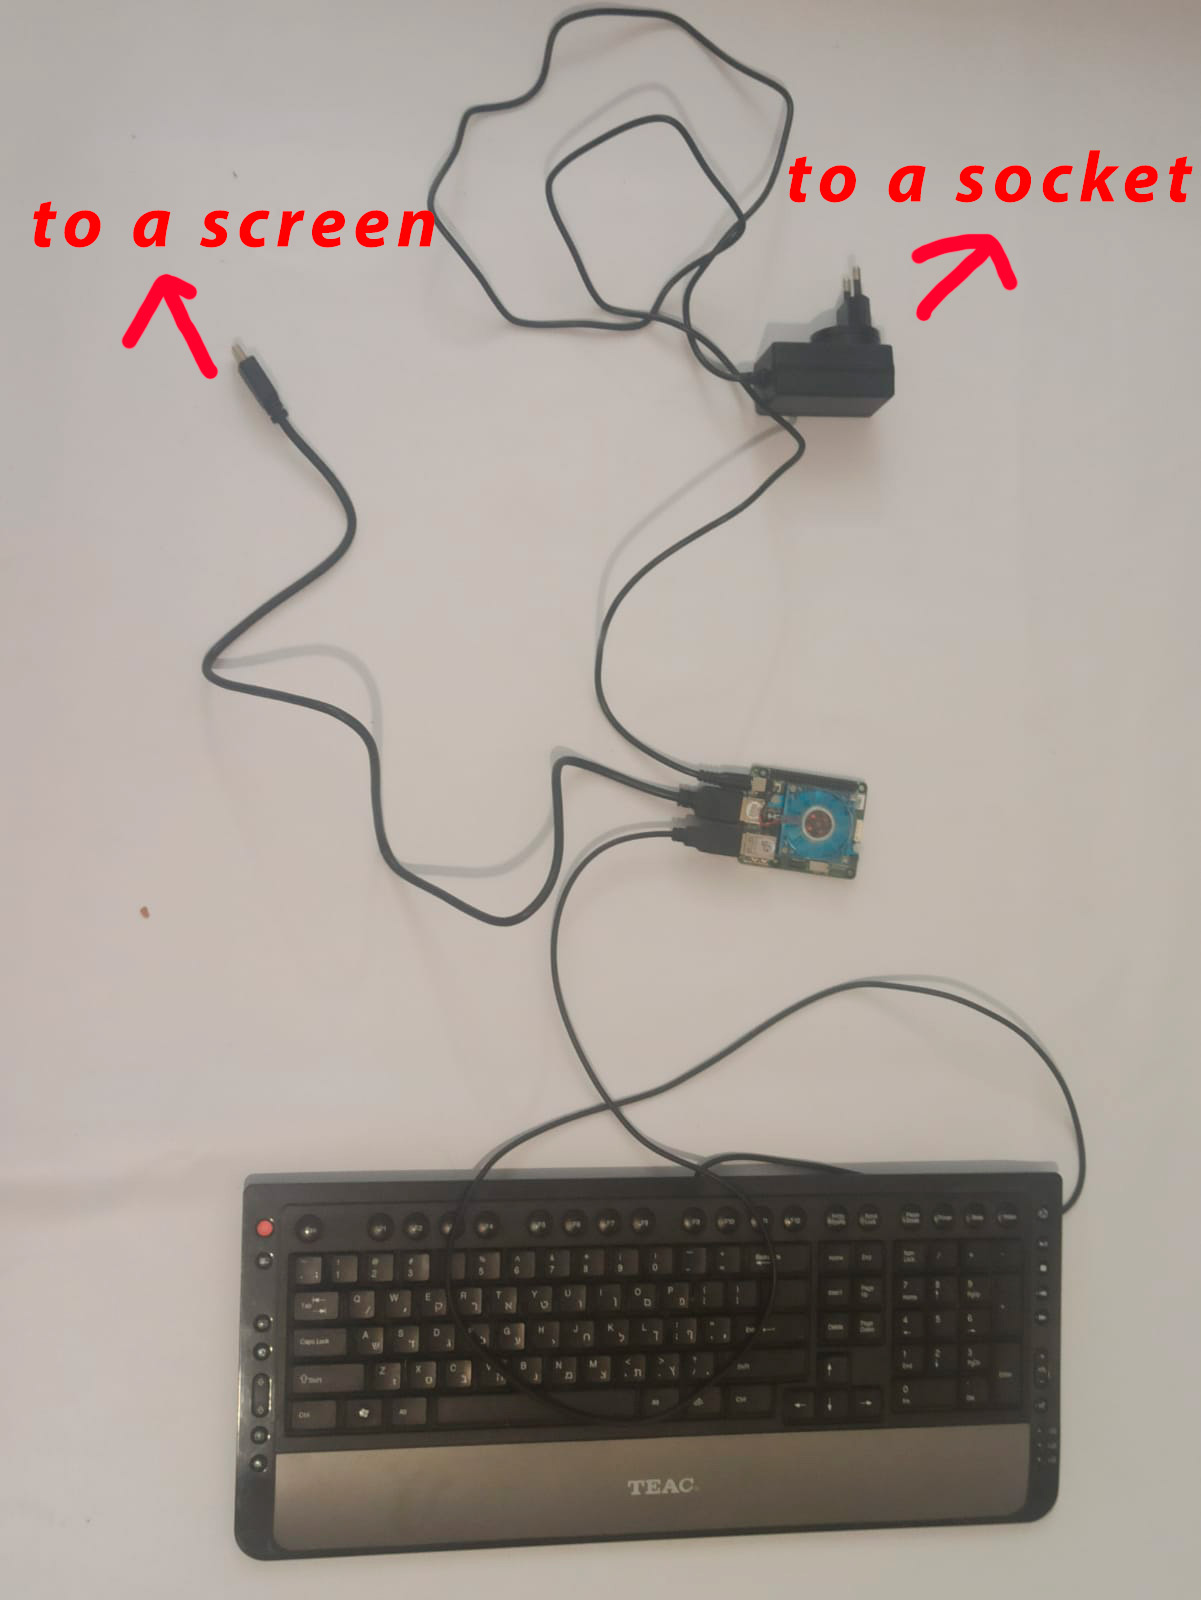
You will need the following:
single board computer Odroid
USB keyboard
HDMI cable
display or TV with HDMI input
Odroid power cable
Then you need to assmeble this primitive electric sheme: Connect a keyboard to you Odroid, connect your Odroid to the display with hdmi cable and plug the odroid to a socket using a power cable
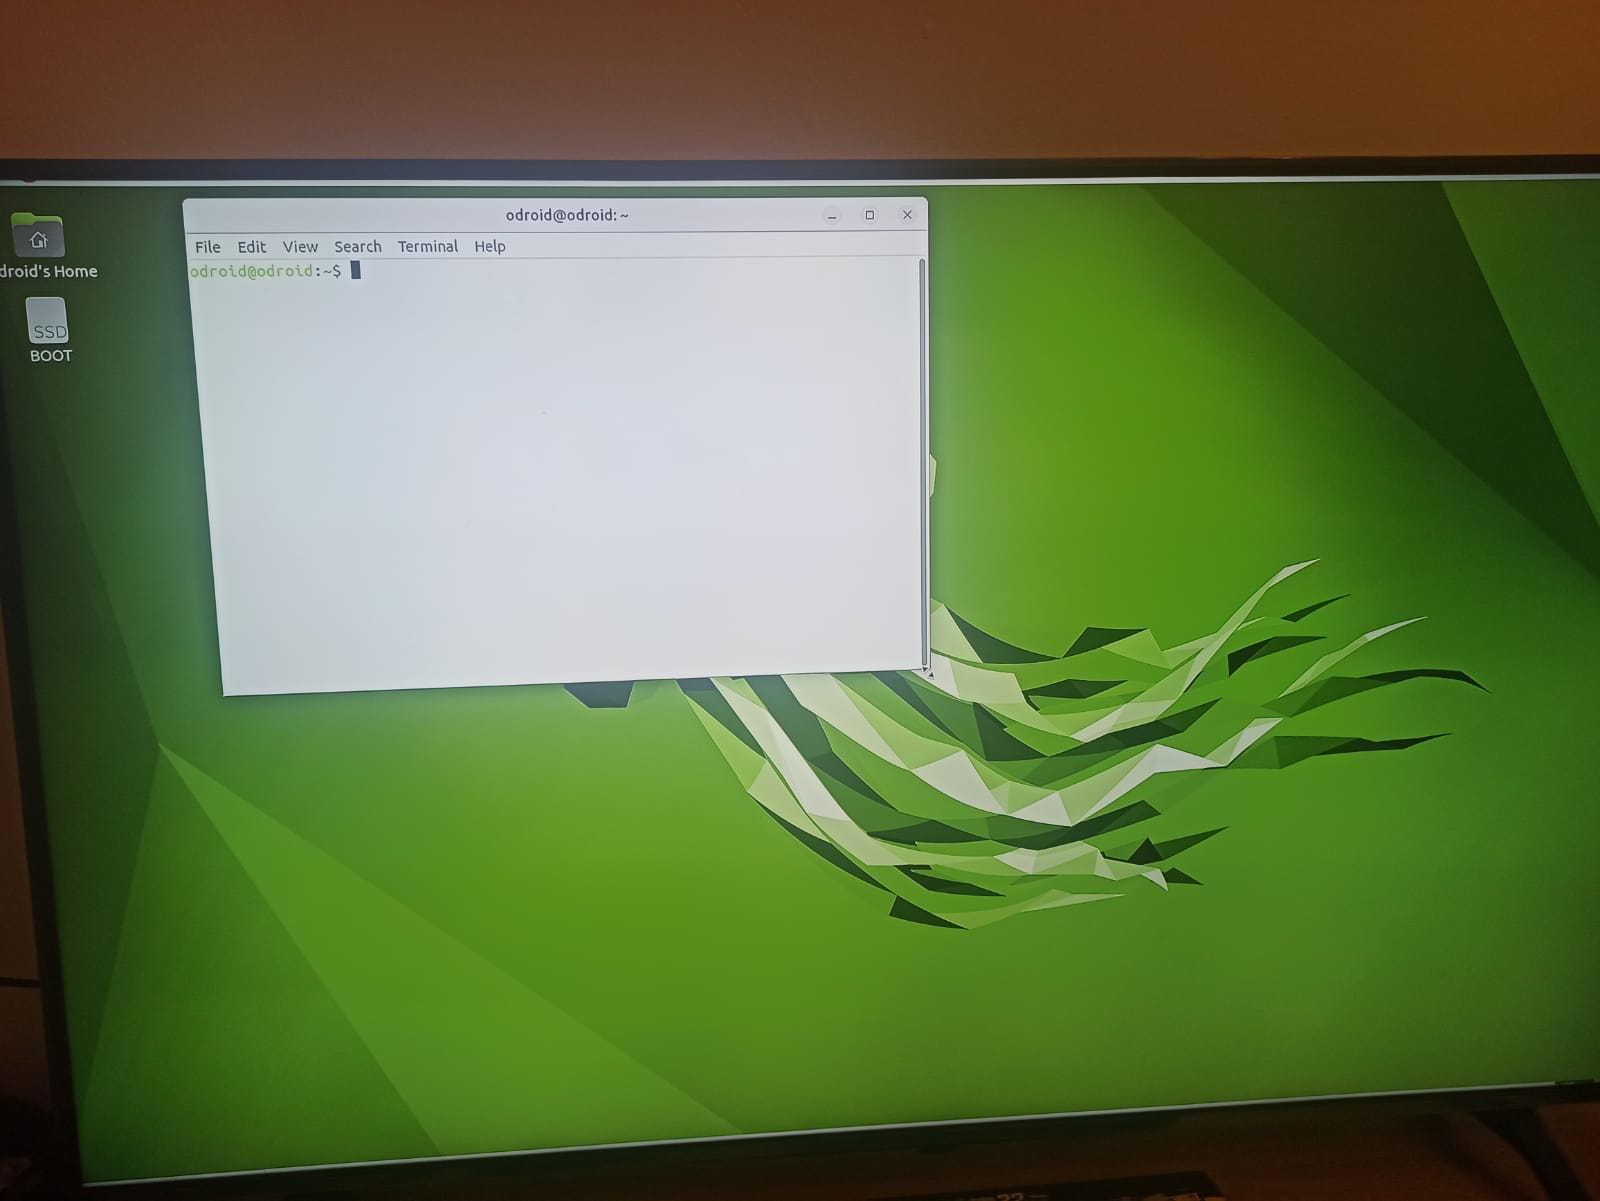
Step 1. Log into odroid#
Now log into your odrdoid as a user, NOT as a guest

Step 2. Open terminal#
Open terminal using combination of keys Ctrl+Alt+T. Use F10 to make it full screen if needed.
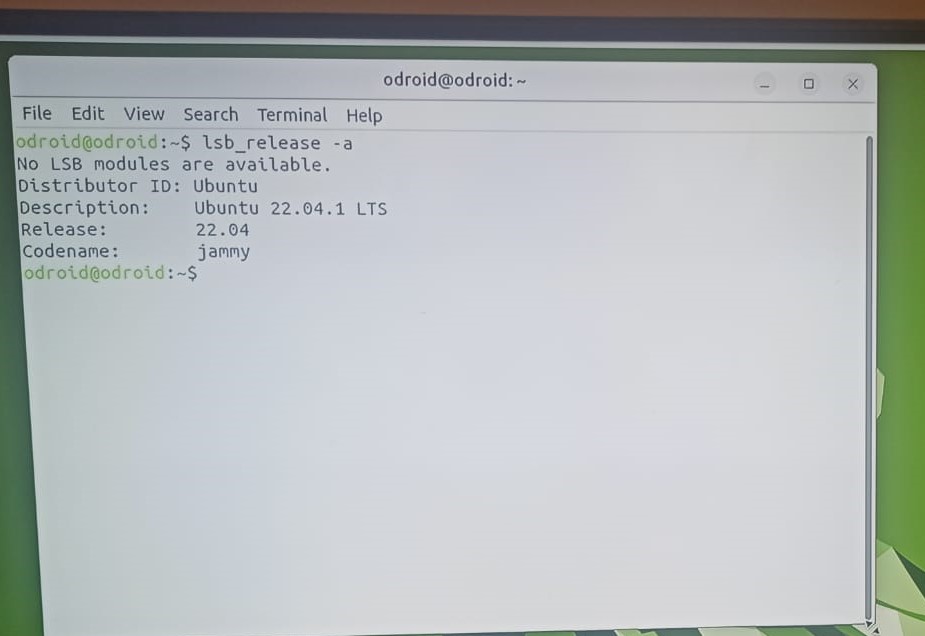
Step 3. Check linux version#
Type lsb_release -a to check your linux version. It should be ubuntu 22.04
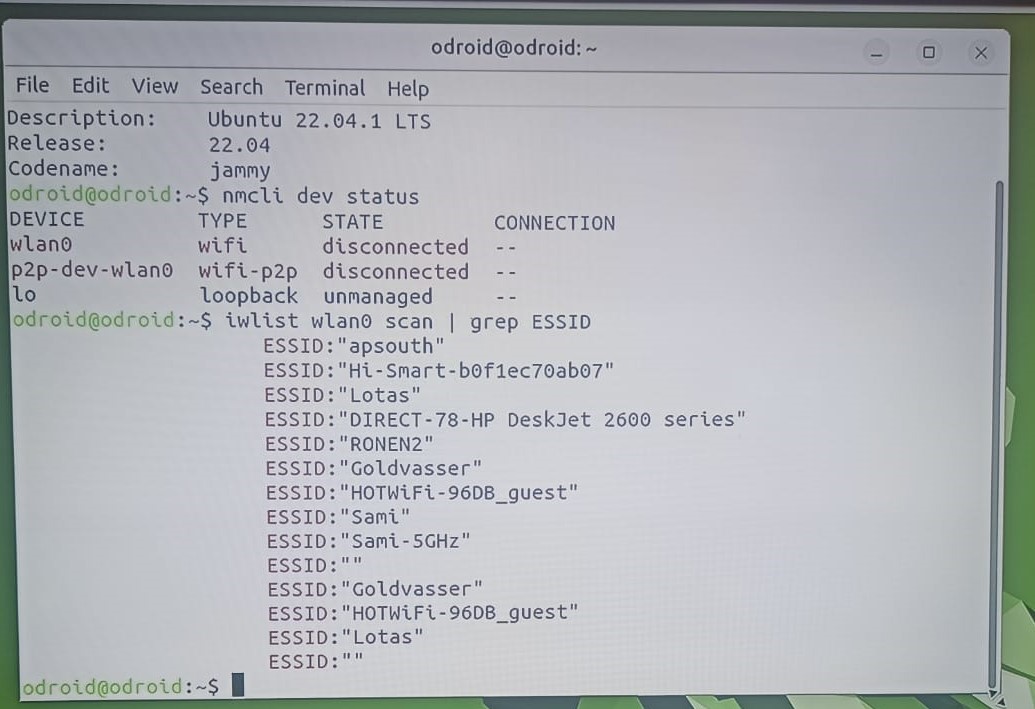
Step 4. Check wifi status and interface#
Now type nmcli dev status to check WiFi status, it should be disconnected.
Aslo check your interface type, you’ll need it further. For me it’s wlan0

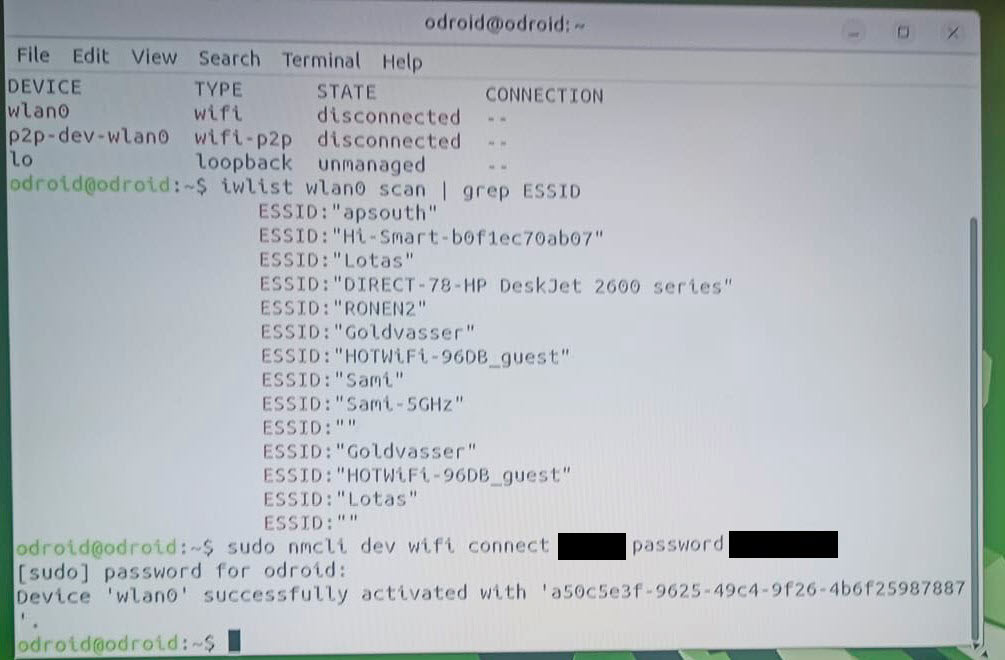
Step 5. Check the list of available networks#
Type iwlist wlan0 scan | grep ESSID to check the list of available wifi networks.
If your interface is different from wlan0 use iwlist scan <your interface> scan | grep ESSID
Step 6. Connect to Wifi#
Type sudo nmcli dev wifi connect <your network name> password <your network password>
Then odroid will ask for user’s password, for odroid board the default one is odroid
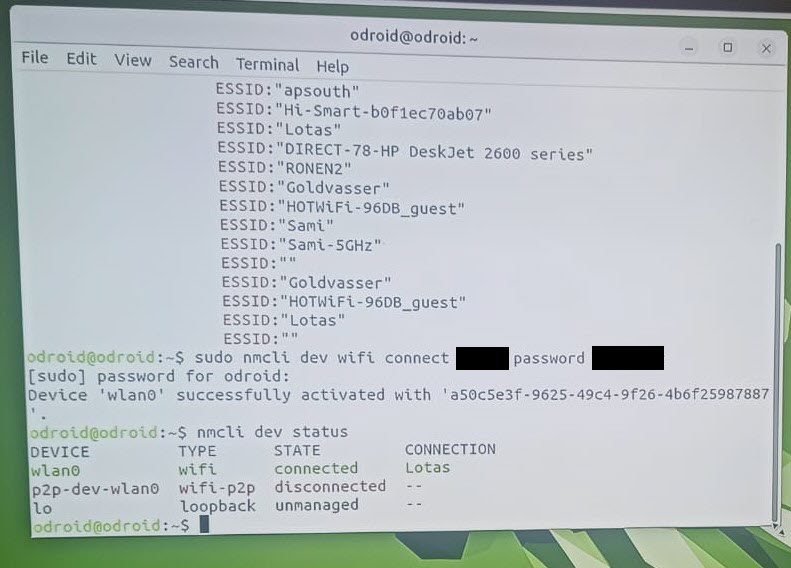
Step 7. Check if everything connected correctly#
Now you can again type nmcli dev status to make sure you cennected successfully,
it should say “connected” and display correct network name.
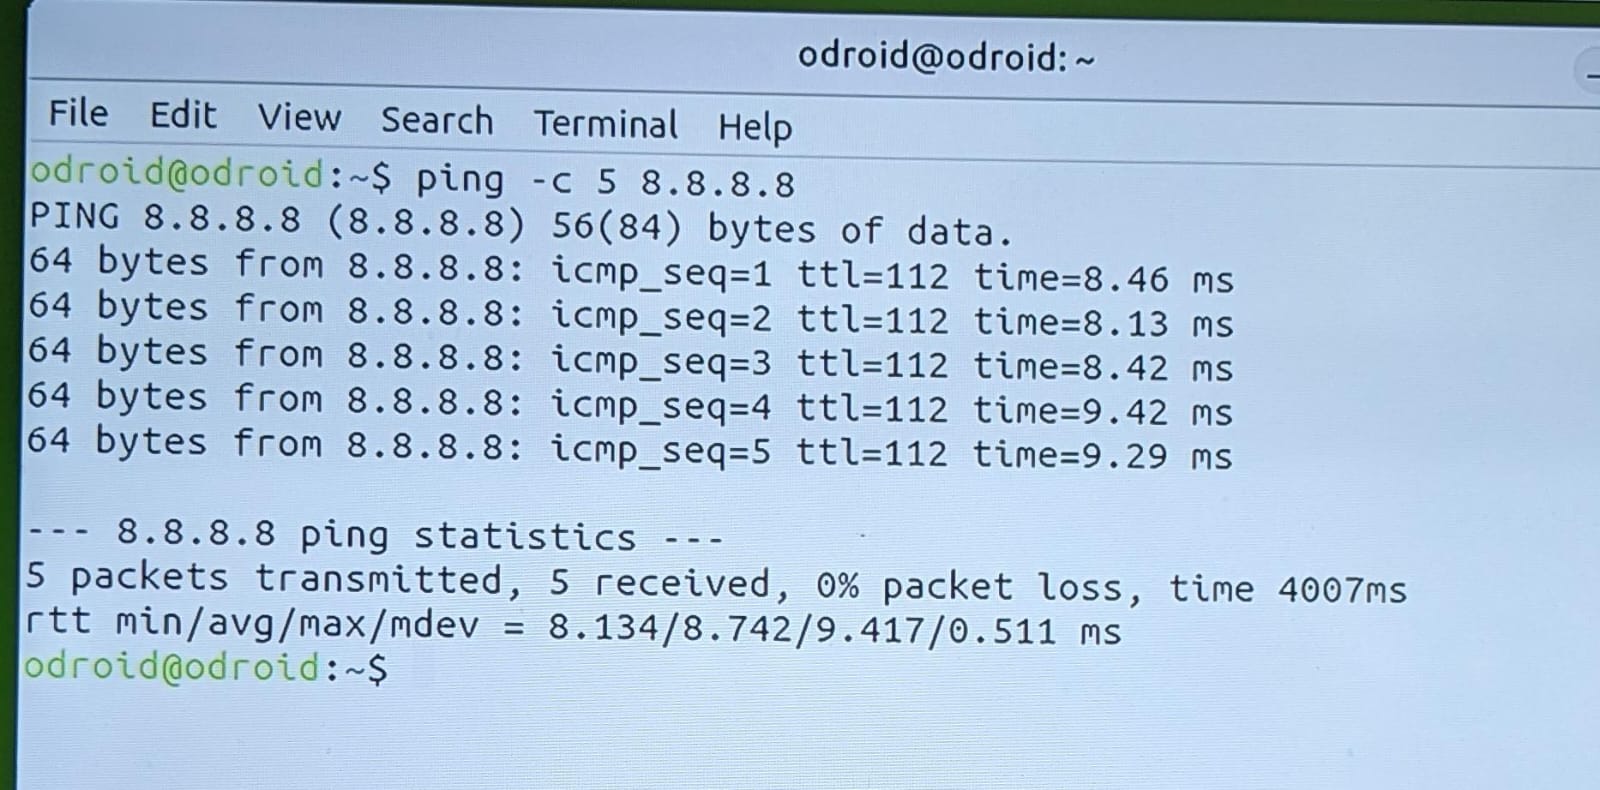
Step 8. Check internet connection#
Type ping -c 5 8.8.8.8 to see if the computer is connected to the Internet. 8.8.8.8 is a Google server.
Step 9. Know your IP address#
Now that you have your Odroid connected to WiFi it can be accesses and managed from any ‘normal’ computer using ssh. SSH server should be running on the Odroid (and it is by default), so to get connected to Odroid one need to know:
login - odroid
password - odroid
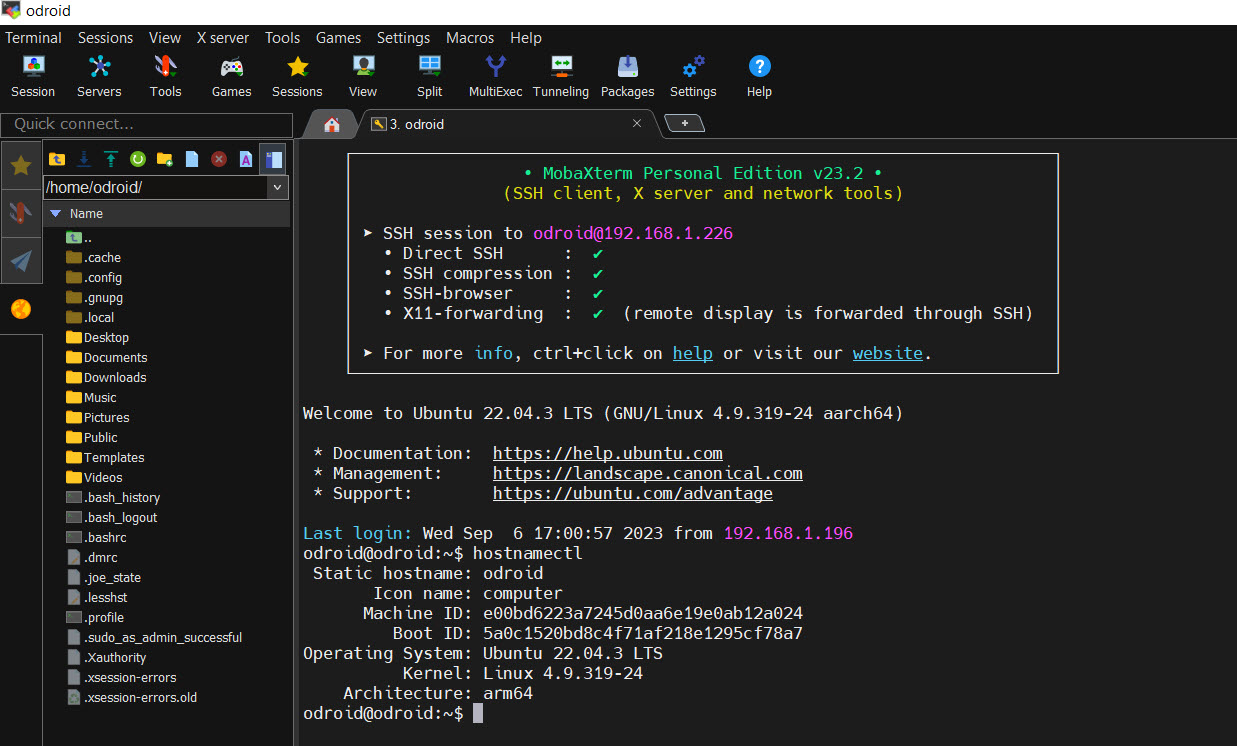
IP address, which we can find by typing
hostname -I.

In this case on the picture the IP address is 192.168.1.226
Step 10. Connect to Odroid with external terminal#
Now that you have your Odroid connected to WiFi it can be accesses and managed from any ‘normal’ computer using ssh. SSH server is already installed and running on Odroid, so let’s install ssh client software onto Windows computer and connect it to the Odroid.
Any SSH client can be used, the one we prefer is MobaXterm Home Edition (free) - https://mobaxterm.mobatek.net/download.html
Download it, install and setup ssh session as it’s shown on a picture below:

Double click session name and try to connect to the Odroid:
Finish#
Congratulations!!! If all the steps are performed correctly now you don’t need to connect your Odroid device to the display or keyboard to be able to manage it. On power up the microcomputer will be connecting to the WiFi network and can be managed from any ‘normal’ computer in the same WiFi network and with ssh client software installed.